Key Takeaways
I approach home charging as a practical electrical project, not a weekend experiment involving optimism and a screwdriver. The right setup starts with your car, your home and the rules that apply where you live.
- Work out whether Level 1 or Level 2 charging suits your overnight routine.
- Check your switchboard, available capacity, cable route and charger location first.
- Match the charger to your EV and the electrical work your home can support.
- Use a licensed electrician for fixed electrical work and confirm local requirements.
- Test the finished installation, then inspect and clean it regularly.
1. Start with the charging basics
A home charger installation guide should begin with the least glamorous question: how much charging do I actually need? My answer depends on how far I drive, how long the car sits at home and whether I can charge elsewhere. Once those details are clear, the choice between a simpler outlet-based setup and dedicated equipment becomes much less mysterious.
Level 1 vs. Level 2 charging explained
Level 1 charging uses a standard household outlet and is generally the gentlest option for a modest daily driving routine. Level 2 charging uses a dedicated higher-capacity circuit and can replenish the car more quickly, provided the vehicle and home electrical system support it. I treat Level 2 as a proper installation project rather than simply buying a more enthusiastic cable.
The useful comparison is not “slow versus fast” in the abstract. It is whether the car has enough time to charge before I need it again, without relying on a circuit that was never intended for the load.
How much range you actually need overnight
I start by looking at an ordinary week rather than the biggest road trip I might take twice a year. If the car is parked for many hours overnight, a slower arrangement may be perfectly workable; if I return late and leave early, faster charging becomes more valuable. I also leave room for cold weather, unexpected errands and the occasional day when my planning falls apart.
That approach keeps the installation grounded. I am paying for useful charging at home, not for an impressive specification that rarely changes my routine.
Comparing hardwired chargers and plug-in models
A hardwired charger is permanently connected to the electrical supply, while a plug-in model connects through a suitable outlet. Hardwiring can provide a tidy, dedicated finish and remove one detachable connection, but it normally requires more fixed electrical work. A plug-in unit may offer flexibility if I move house or need to replace the equipment, though the outlet and circuit still need to be correctly installed.
I compare the two by considering future changes as well as today’s convenience. A removable charger is not a shortcut around electrical safety; it still needs the right circuit, protection and installation method.
Estimating charging speed for your EV
Charging speed depends on the vehicle’s onboard charger, the charger’s available output and the electrical supply. The highest number printed on the equipment does not automatically become the speed my EV accepts. I check the vehicle manual and charger documentation, then ask the electrician to confirm what the circuit can safely deliver.
A simple estimate is more useful than false precision: available charging power multiplied by the hours the car is connected, adjusted for the vehicle’s limits. I use that estimate to decide whether the proposed setup fits my routine, rather than treating a brochure figure as a promise.
2. Check whether your home is ready
Before choosing a wall location, I inspect the home as a whole. The switchboard, cable route, parking position and outdoor exposure all affect the job. A neat charger on the wall is only the visible tip of the electrical work beneath it.
I photograph the panel and the proposed route before requesting quotes, because memory becomes surprisingly unreliable once someone starts discussing conduit bends. That small bit of preparation also helps me compare like with like.
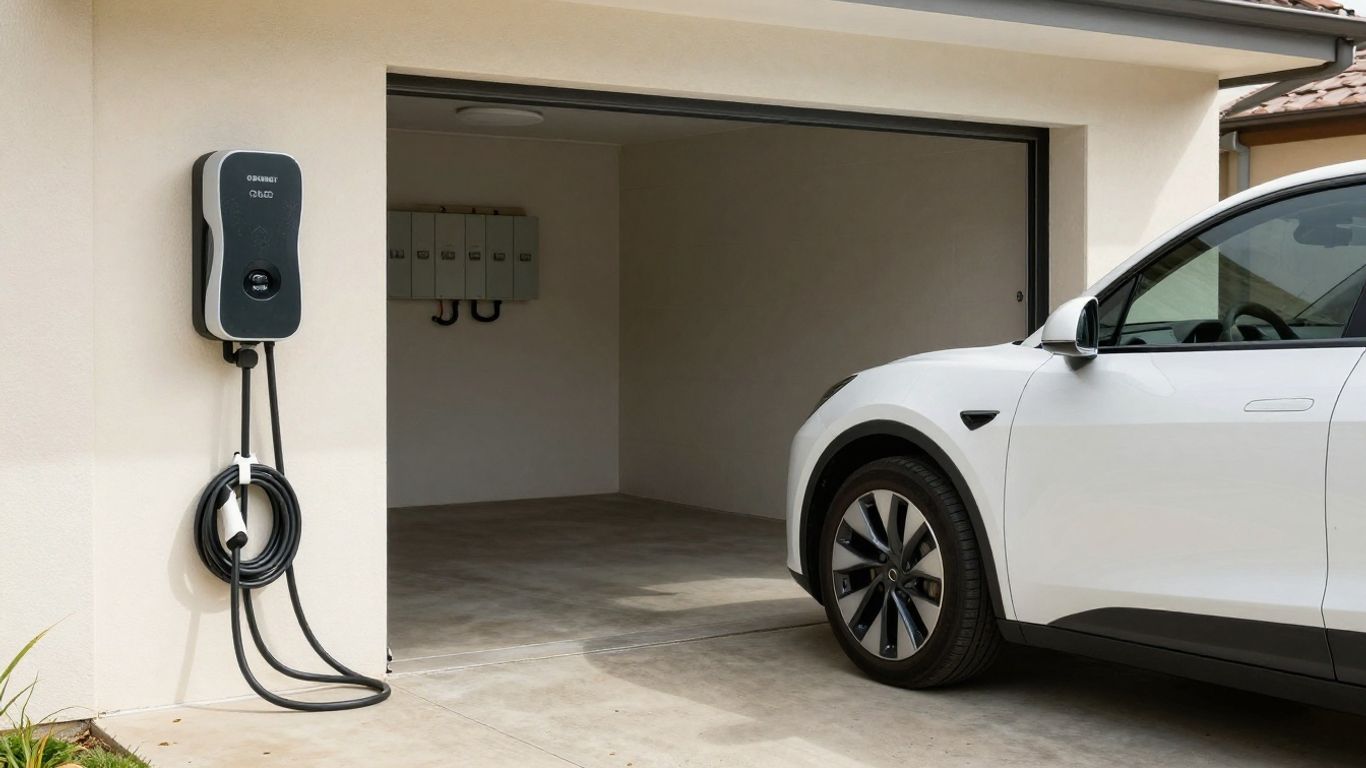
Inspecting your electrical panel and service capacity
I look for the switchboard’s age, available space, existing circuits and signs of heat, damage or overcrowding, but I do not remove covers or work inside it. The home’s overall supply capacity matters too: an EV charger joins the household’s other substantial loads, rather than living in a magical electrical suburb of its own.
An electrician can assess whether a new circuit is practical and whether additional protection or broader electrical work is needed. If the panel already looks tired or improvised, I would rather discover that before installation day.
Choosing the best location for the charger
The best location is close enough to the parking bay for convenient cable handling, while leaving room to open doors, walk past safely and access the equipment. I consider whether the car parks consistently in the same place and whether another vehicle, bicycle or storage shelf could block the charger later.
Wall height and visibility matter as well. I want the connector easy to reach without leaving the cable stretched across a walkway, but not positioned where a reversing bumper can introduce itself rudely.
Measuring cable reach, clearance, and weather exposure
I measure from the likely charger position to the car’s charging port, allowing for the cable’s natural curve rather than drawing a heroic straight line. I check corners, doorways, drainage, overhead obstructions and the clearance needed to hang the connector securely. Outdoor locations also need protection from rain, sun, dust and accidental knocks.
These measurements prevent a common disappointment: a charger that technically reaches the car but only if I park at an angle that irritates everyone. A little cardboard mock-up on the wall can reveal awkward positioning before any drilling begins.
Spotting issues in older homes before they become expensive surprises
Older homes may have limited switchboard space, dated wiring, difficult access through walls or previous alterations that are not obvious from the driveway. I also look for damp areas, brittle surfaces and routes that pass through storage spaces or other vulnerable locations. None of these automatically rules out home charging, but each can affect the method and cost.
I tell the electrician about renovations, extensions and any known electrical quirks. Honest background information is cheaper than asking the finished installation to explain a mystery later.
3. Choose the right home charger
I choose the charger only after understanding the car and the house. A higher output is not automatically better if the vehicle cannot use it or the home cannot support it. The sensible choice is the one that delivers useful charging while fitting the installation, weather and daily routine.
I also read the instructions before buying. That is a humbling habit, but it tells me what connections, clearances, network requirements and operating conditions the equipment expects.
Matching amperage to your vehicle and electrical system
The charger’s current rating needs to work with the EV’s onboard charging limit and the circuit designed for it. I ask the electrician to confirm the protective devices, cable size and installation method rather than trying to infer the answer from a single product label.
Some homes may need load management or a different charging setting so the charger does not compete carelessly with other large appliances. The practical limit matters most: a safe, usable installation beats an ambitious rating that cannot be sustained.
Comparing smart features, connectivity, and load management
Smart features can include an app, remote status information, scheduling or a connection to the home network, depending on the model. I decide which of those I would genuinely use. A reliable schedule can be useful when I want charging to happen at particular times, while load management may help coordinate charging with the rest of the home’s demand if the system supports it.
I check whether the charger needs steady Wi-Fi, Bluetooth pairing or another setup method. If the garage is a network dead zone, a clever feature can become a small daily annoyance wearing a very modern hat.
Understanding indoor, outdoor, and weatherproof ratings
A charger installed outdoors needs an enclosure and installation method suited to its exposure. I check the manufacturer’s stated environmental rating, cable storage instructions and temperature limits rather than assuming “outdoor” means indestructible. Placement under cover can reduce exposure, but it does not excuse unsuitable equipment or poor drainage.
Inside a garage, I still consider dust, moisture from wet cars and accidental impact. Indoor installation is not the same as risk-free installation.
Balancing upfront price with long-term convenience
The purchase price is only one part of the decision. I consider installation complexity, cable length, replacement parts, network dependence and whether the charger will remain useful if I change vehicles. A cheaper unit can make sense if it meets the documented requirements, while a more feature-heavy option may be worthwhile only when I will use those features.
I compare complete installed proposals, not just equipment prices. That makes hidden work easier to spot and keeps the decision tied to the actual home rather than an optimistic online shopping basket.
4. Handle permits, codes, and professional help
Electrical work sits inside a framework of local requirements, inspection practices and manufacturer instructions. Those details can vary by location and installation type, so I do not treat advice from a different state, territory or country as a universal answer. I confirm the current requirements before work starts.
The safest installation is not necessarily the one with the most dramatic cable route. It is the one that is properly designed, documented and finished for the place where it will operate.
When a permit is required
Whether approval, notification or inspection is required depends on the work and the rules applying in the relevant Australian jurisdiction. I ask the electrician who is responsible for checking those requirements and what paperwork I will receive when the job is complete. I also keep the charger instructions and installation records together.
I avoid assuming that a plug-in connection means no requirements apply. The fixed circuit, outlet and protective equipment may still be part of regulated electrical work.
Why local electrical codes matter
Local rules address matters such as protection, cable installation, clearances, equipment suitability and testing. They are not decorative hurdles placed between me and a full battery. They help account for the conditions under which the charger will operate and the way the installation can be inspected or maintained.
I use the rules as a prompt to ask better questions: what protection is required, how will the cable be supported, and what happens if the charger is outdoors? Clear answers are reassuring; vague confidence is not.
Finding a licensed electrician
I look for an electrician licensed for the work in my jurisdiction and ask about experience with EV charging installations. Before accepting a quote, I want the scope, equipment, cable route, protection, testing and documentation described clearly. I also check who handles any required approvals and whether the quoted work includes making good around penetrations.
A useful quote should leave fewer mysteries than it began with. If two proposals differ sharply, I ask what each includes rather than automatically choosing the shorter number.
Knowing which tasks are safe for DIY enthusiasts—and which are not
I am comfortable measuring the parking bay, clearing shelves, checking my network signal and preparing questions. I am not comfortable opening the switchboard, selecting protective devices by guesswork or making live electrical connections. Fixed wiring and testing belong with a suitably licensed professional.
My rule is simple: I can prepare the room, but I do not pretend to be the electrician. That distinction saves both time and a great deal of unnecessary excitement.
5. Plan the installation step by step
A good installation plan turns a vague wall-mounted idea into a sequence of decisions. I map the route, confirm the hardware, think through physical protection and clear the work area. Doing this before the electrician arrives makes the appointment more productive and reduces last-minute compromises.
I keep the plan practical rather than precious. If a route is awkward, I would rather change it on paper than defend it after holes have appeared.
Mapping the cable route from the panel to the charger
I trace the shortest sensible route from the switchboard to the charger, noting walls, ceilings, corners, access panels and areas exposed to vehicles or stored items. The shortest path is not always the best path if it creates poor clearances or difficult future maintenance. I mark likely entry and exit points without drilling anything.
I also think about what the route may encounter later. A cable hidden behind a shelf or vulnerable to a bicycle handle is not well planned merely because it is out of sight.
Selecting conduit, breakers, and other required hardware
The electrician selects the cable, breaker, isolation and protective equipment required for the charger and the installation conditions. Conduit, glands, fixings and weather seals also need to suit the route and environment. I ask for those items to appear in the quote so “installation materials” does not become a mysterious final chapter.
The correct hardware depends on the design, not on whatever was left in a toolbox. I leave those technical selections to the professional who has assessed the circuit.
Protecting the installation from water, impact, and curious pets
I look for dripping pipes, direct rain, splash zones, garden equipment and anything with wheels. The cable should be supported and stored so it cannot become a trip hazard or an invitation to chew. Outdoor fittings need appropriate sealing, while garage installations need protection from knocks and clutter.
My dog has never shown interest in electrical engineering, but I do not rely on that streak of good character. Physical protection is a design feature, not an afterthought.
Preparing the work area before installation day
I clear the wall, move the car and remove shelves or boxes that obstruct access to the panel and route. I make sure the electrician can reach the proposed work area without navigating a domestic obstacle course. I also confirm where the car can park during testing.
A tidy work area gives the installer room to work safely and gives me a better chance of noticing whether the finished result matches the plan. It is low-tech preparation, which is often the most reliable kind.
6. Complete setup and test the charger
Installation is not finished when the unit is attached to the wall. I want the electrical work, charger settings, vehicle connection and any network features checked in a controlled order. This is where a neat-looking installation earns its keep—or reveals that it needs another conversation.
I keep the manuals, test information and account details together. Future me will appreciate this, especially when present me has forgotten which password was chosen in a moment of misplaced confidence.
Connecting the charger to your EV and home network
I first connect the charging cable to the car according to the vehicle and charger instructions. If the charger has network features, I follow the documented pairing process and confirm that the unit is visible to the relevant app or interface. I do not assume that a glowing light means every connection is working.
The car should recognise the charger, and the charger should report its operating state clearly. If either side behaves oddly, I stop and check the instructions rather than repeatedly unplugging things in the hope of inspiration.
Configuring charging schedules and energy limits
I set schedules only after confirming the vehicle’s own charging controls and the charger’s controls do not conflict. If the equipment supports an energy or current limit, I use the setting approved for the installation rather than selecting a larger figure because it looks efficient. A schedule should fit my actual departure routine and allow sensible flexibility.
I record the settings once they work. That makes later troubleshooting easier and prevents me from blaming the charger for a timetable I accidentally created myself.
Testing voltage, connectivity, and charging performance
Testing should confirm the electrical installation, communication between the charger and vehicle, and the charger’s ability to start and maintain a session. I ask the electrician what was tested and what documentation is provided. I then watch an initial charge long enough to confirm the expected status, rather than treating the first successful click as the entire test.
I also check cable handling, connector storage and whether the car can be parked normally while charging. Performance includes everyday usability, not just an impressive number on a screen.
Confirming that safety features work as intended
The electrician should verify the protective measures required for the installation and explain what the charger indicates when it detects a fault or stops a session. I learn how to isolate the equipment if the instructions allow it and what signs mean I should stop using it. I do not test safety by creating a fault deliberately.
A charger that stops safely is doing its job, even if the interruption is inconvenient. I would much rather investigate a clear protective response than ignore a warning because the car was nearly ready for a trip.
7. Keep the charger reliable and trouble-free
Once the charger works, I give it a small amount of routine attention. I inspect visible parts, keep the area clear and pay attention to changes in sound, heat, connectivity or charging behaviour. The aim is not to fuss over the unit; it is to notice problems while they are still obvious.
I also remember that the charger is part of an electrical system. Repeated tripping, heat or damage is a reason to stop and seek help, not a puzzle to solve with increasingly determined button presses.
Inspecting plugs, cables, and connections
I look for cuts, flattened sections, loose fittings, discolouration, cracked plugs and signs of water entry. I check that the cable hangs or rests as intended and that the connector locks or stores properly. I never drag the cable by its plug or leave it where a vehicle can roll over it.
If anything looks damaged or unusually hot, I stop using the charger and follow the manufacturer’s instructions for assistance. A cable is not improved by being given a brave second chance.
Cleaning the unit without giving it a bath
I remove dust with a soft, dry or lightly damp cloth as allowed by the instructions, keeping water away from openings and connections. I do not pressure-wash the charger, pour cleaner over it or scrub labels until they become abstract art. Outdoor units still need sensible care around seals and cable connections.
Cleaning is mainly about keeping surfaces and connectors free from grime that could hide damage. It is not an invitation to dismantle the enclosure.
Troubleshooting common charging problems
When charging fails, I work through the simple possibilities first: the vehicle may not be fully connected, a schedule may be active, the network may be offline, or the charger may have stopped after detecting a condition. I check the vehicle display, charger indicators and relevant instructions before resetting anything. I write down the exact warning rather than translating it into “it made a weird light”.
A short sequence keeps troubleshooting orderly:
- Confirm the vehicle is in the correct charging state.
- Check the cable and connector for visible damage or poor seating.
- Review schedules, limits and network status.
- Check whether the charger or electrical protection has stopped the session.
After that, I follow the documented reset process if one is provided. Repeated faults deserve attention rather than repeated resets.
Knowing when to call an electrician or the manufacturer
I contact an electrician for electrical faults, heat, burning smells, damaged wiring, repeated tripping or anything involving the fixed installation. I contact the manufacturer for equipment errors, app problems, warranty questions and behaviour that the installation tests do not explain. If I am unsure whether the issue is electrical or product-related, I stop using the charger and describe the symptoms to both parties as needed.
Keeping the model details, installation records and error messages nearby makes that conversation quicker. A calm handover beats a heroic guess, especially where electricity is involved.