Key Takeaways
A home charger installation guide is most useful when it deals with the unglamorous details as well as the shiny charger on the wall. I have found that a little planning prevents expensive surprises later.
- Check your switchboard capacity before choosing a charger.
- Match charging speed to your ordinary driving routine.
- Use a licensed electrician for circuit design and installation.
- Budget for wiring, permits, labour, and possible upgrades.
- Inspect and maintain the charger so small faults do not grow.
Start with the right home charging setup
The best home charging setup is not necessarily the fastest one available. I start with how far I drive, where I park, and how long the car usually sits overnight. That usually gives me a more sensible answer than shopping by headline power alone.
Level 1 vs. Level 2 charging explained
Level 1 charging uses a standard household outlet and is usually the simplest place to begin. It can suit a car that travels modest distances and spends many hours parked. Level 2 charging uses a dedicated higher-voltage circuit, so it can replenish the battery more quickly, but it also needs proper electrical planning and installation.
I think of Level 1 as a slow top-up and Level 2 as a dedicated appliance. Neither is automatically right or wrong. The useful question is whether the car can recover the energy I use between one drive and the next without making charging a daily chore.
How to match charging speed to your driving habits
I look at my weekly pattern rather than my most dramatic road trip. A short weekday commute, regular access to overnight charging, and occasional longer journeys may not justify the largest charger the home can support. Conversely, frequent driving or several EVs may make faster charging more worthwhile.
A charger should fit the vehicle’s own charging limit too. Paying for more output than the car can accept does not make the car charge faster; it simply adds cost or unused capacity. I would rather choose a dependable setup that quietly restores the energy I need while I sleep.
Choosing between a hardwired charger and a plug-in model
A hardwired charger is permanently connected to its circuit, which can create a neat installation with fewer exposed connection points. A plug-in model can offer flexibility if I move house or want to replace the charger later, provided the outlet and circuit are designed for that use. The decision depends on the equipment, location, household habits, and local requirements.
I would not treat a familiar-looking socket as proof that it is suitable. High, continuous loads deserve the same care as any other significant electrical appliance. An electrician can confirm whether the proposed outlet, plug, breaker, and cable arrangement belong together.
When a smart charger is worth the extra features
Smart functions can be useful when I want scheduled charging, remote status checks, or a clearer view of household energy use. They are less compelling if I will plug in at the same time every night and rarely check an app. Wi-Fi is also only helpful when the charger has a reliable connection where it is installed.
I try to separate genuinely useful controls from decorative dashboard clutter. Simple daily reliability matters most to me. A charger that connects occasionally but charges consistently may be more practical than one with an impressive app and an unreliable signal.
Check your home’s electrical readiness
Before I buy equipment, I inspect the relationship between the switchboard, parking space, and proposed cable route. The distance between those points can affect labour, conduit, drilling, and sometimes the entire feasibility of the job. A tidy plan at this stage makes the electrician’s quote more useful.
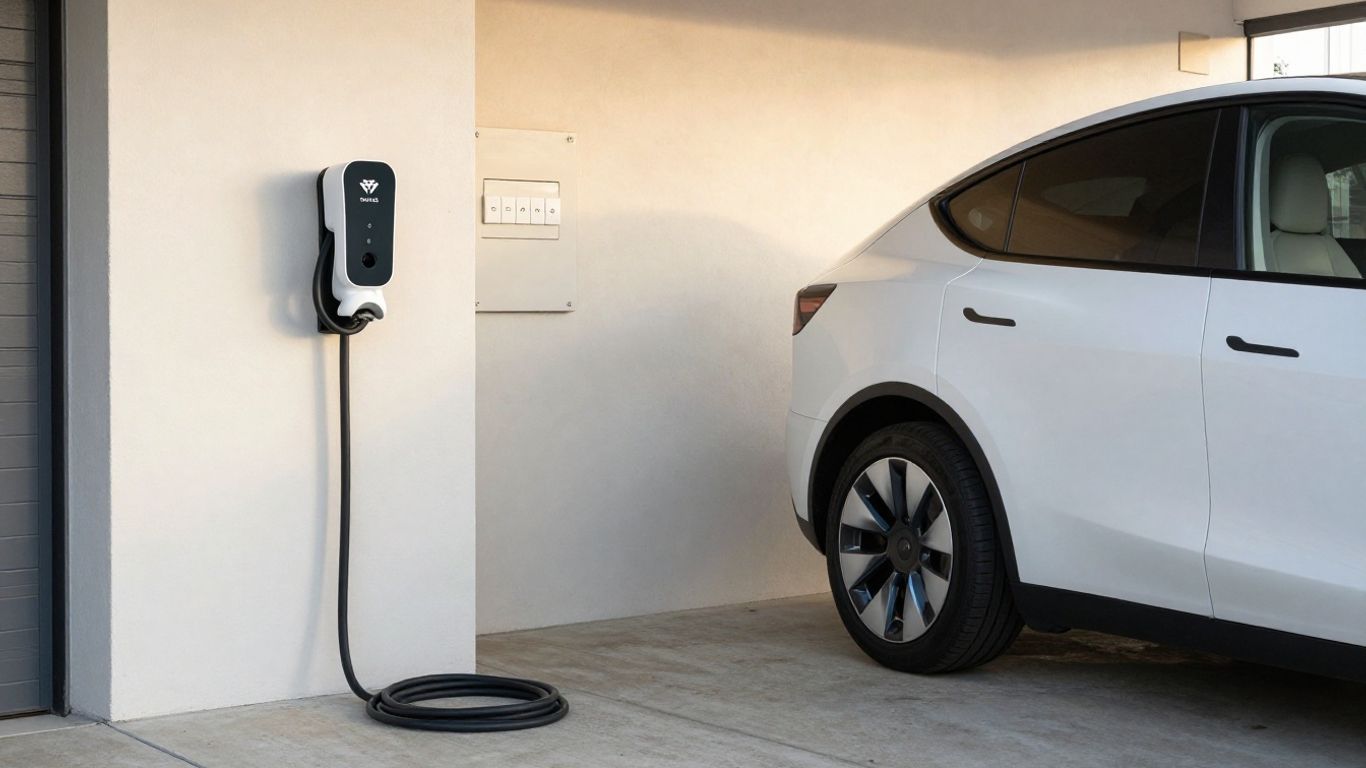
I also consider whether the charger will be exposed to rain, heat, vehicles, or garden equipment. The most convenient wall is not always the safest wall. Small practical details, such as where the cable rests when it is not in use, become very noticeable after installation.
Understanding your electrical panel capacity
The switchboard needs enough available capacity for the proposed charging circuit alongside the home’s existing loads. An electrician may need to assess the main supply, spare spaces, existing breakers, and the way large appliances operate together. An apparently roomy board does not necessarily mean the incoming supply can support another substantial load.
I avoid guessing from the number of breaker spaces alone. The age and condition of the board, its labelling, and the overall electrical design matter as well. If the assessment identifies a limitation, I would rather know before buying a charger than discover it halfway through installation.
Finding the best charger location
I choose a position close enough to the parking bay that the cable reaches without stretching across a walkway. The charger should be easy to access, protected from accidental knocks, and mounted where its controls and indicator lights remain visible. If more than one car may use the space, I include both parking positions in the test.
A location near the switchboard may reduce cable work, but it is not the only consideration. A slightly longer route could create a safer, more convenient result. I mark the likely parking position with the car present, rather than measuring an empty garage and hoping for the best.
Measuring cable reach, clearance, and weather exposure
I measure from the proposed charger position to the vehicle’s charging inlet, allowing for the route the cable will actually take. I leave enough slack for ordinary use but avoid creating a loop where tyres, doors, or pedestrians can catch it. I also check clearance around the charger, especially if a garage door or storage shelf moves nearby.
Outdoor installations need equipment rated for the conditions and a mounting point that does not invite water to sit around connections. Shade can help with heat, while drainage and splash exposure deserve attention. These are straightforward observations, but they are much cheaper to make before the wall is drilled.
Spotting signs that your wiring needs an upgrade
Old, damaged, warm, or poorly labelled electrical equipment deserves attention before an EV charger is added. Flickering lights, nuisance breaker trips, scorch marks, cracked outlets, or a crowded and untidy switchboard are reasons to pause. I would also flag any uncertainty about earthing or previous electrical alterations.
The charger should not be used to test how much strain an ageing installation can tolerate. An electrician can identify whether the issue is limited to the proposed circuit or points to wider work. That conversation may add to the quote, but it can prevent a much nastier surprise later.
Choose the right charger and equipment
Once the home’s electrical position is clearer, I compare chargers by compatibility and day-to-day usefulness. The product label matters, but so do the vehicle connector, cable arrangement, weather rating, warranty, and installation requirements. I prefer a short list of equipment that fits the home rather than a long list of impressive specifications.
Comparing amperage, connector types, and power output
Amperage and power output affect charging speed, but the vehicle and circuit set practical limits. I check the car manufacturer’s requirements and the charger’s installation instructions together. Connector compatibility is equally important: a charger needs to connect securely to the vehicle I actually own, not merely to an attractive specification sheet.
A small comparison can keep the decision grounded:
| Feature | What I check | Why it matters |
|---|---|---|
| Amperage | Vehicle and circuit limits | Avoids paying for unsuitable output |
| Connector | Vehicle inlet and cable type | Ensures the charger can connect |
| Power output | Charger rating and home capacity | Sets realistic charging performance |
| Cable design | Fixed cable or socketed unit | Affects convenience and storage |
This table is a starting point, not a substitute for the installation assessment. The electrician still needs to confirm that the selected equipment can be supplied safely at the proposed location. If the car changes later, connector and output choices may become more important than they first appeared.
Selecting compatible circuit breakers and wiring
The breaker, cable size, protective devices, and charger must be selected as one electrical system. I do not choose a breaker by matching a number on the charger box and leave the rest to chance. The installation method, cable length, surrounding conditions, and local requirements can all affect the correct arrangement.
This is where a qualified electrician earns their fee. The charger may be the visible part of the project, but the less visible circuit determines whether it operates safely and reliably. I keep the charger instructions available so the installer can verify the manufacturer’s requirements rather than work from memory.
Evaluating Wi-Fi, scheduling, and energy-monitoring features
Scheduling can help me charge during a preferred period, particularly when household demand is high at other times. Energy monitoring may make consumption easier to understand, although the detail and accuracy depend on the equipment and installation. Wi-Fi should be treated as a convenience, not as a reason to place the charger somewhere unsafe.
I also check whether basic charging still works if the internet connection drops. Local controls, clear status indicators, and sensible fault notifications can matter more than a crowded app. I want technology that reduces fiddling, not another household device that requires regular coaxing.
Balancing price, warranty, and long-term reliability
The cheapest charger is not automatically the least expensive choice once installation and replacement are considered. I compare the warranty period, support arrangements, spare parts position, cable quality, and suitability for the intended environment. A modest charger with clear documentation can be a better purchase than a feature-heavy model I do not need.
I keep the receipt, installation paperwork, and product instructions together. That small bit of administration makes future troubleshooting easier and may help if a warranty question arises. Reliable equipment is reassuring, but reliable records are a close second.
Plan the installation safely
A home charger is a permanent electrical addition, not simply a gadget that happens to hang on a wall. I plan the work around safety, access, approvals, and the existing structure of the home. That approach may feel slower at the beginning, but it leaves fewer loose ends.
Why a licensed electrician is usually the smart move
A licensed electrician can assess the supply, select the circuit design, install the equipment, and identify problems that are invisible to a casual inspection. I am comfortable measuring the parking space and making a shortlist, but I would not improvise the electrical connection. The work needs to suit both the charger instructions and Australian requirements.
A professional quote should describe what is included, such as cable routing, protective devices, mounting, testing, and any likely extra work. If the quote is vague, I ask questions before the appointment rather than assuming the gaps will somehow resolve themselves.
Permits, inspections, and local code requirements
Requirements can vary by state, territory, property type, and the specific work being done. I check with the electrician and the relevant local authority about permits, notifications, inspections, and certificates. Rental properties, apartments, heritage homes, and shared garages can introduce extra permissions or access issues.
I keep records of approvals and certificates with the charger manual. They may be useful for future electrical work, a property sale, or an insurance conversation. I treat compliance as part of the installation rather than paperwork that can be tidied up afterwards.
Safety features such as GFCI protection and shutoff access
The installation should include the protective measures required for the equipment and location, along with a practical way to isolate the circuit when necessary. I ask where the relevant shutoff is and how the protection operates. It is not very helpful if the only person who knows the arrangement is the person who installed it.
I also make sure the charger is not blocked by stored boxes or positioned where a cable becomes a trip hazard. Clear access is a safety feature in its own right. The neatest installation is one that remains easy to inspect and isolate months later.
Common DIY mistakes that can turn charging into sparking
The tempting shortcuts are usually the ones that hide risk: using an unsuitable extension lead, sharing a circuit with heavy appliances, relying on a warm or loose outlet, or mounting equipment without checking the wall and weather exposure. I have no interest in turning a quiet charging session into an unexpected electrical demonstration.
Before I hand the job to a professional, I can still do useful preparation:
- Photograph the switchboard and proposed cable route.
- Clear the parking and mounting areas.
- Gather the vehicle and charger specifications.
- Note any breaker trips, warm outlets, or visible damage.
That preparation gives the electrician better information without crossing into work that requires electrical expertise. I then leave the circuit, connections, testing, and certification to the person qualified to handle them.
Understand the installation process
Knowing the usual sequence makes the project feel less mysterious. I expect the electrician to confirm the plan, prepare the circuit, route the wiring, mount the unit, and test the finished installation. The exact order can vary with the property, but the underlying checks should not disappear simply because the job looks straightforward.
Preparing the circuit and mounting location
The electrician first confirms the proposed charger position and the route back to the switchboard. They may mark penetrations, check the mounting surface, and install or prepare the dedicated circuit. I keep the area clear so the work can be done without moving cars, shelves, or garden equipment around the electrician.
The mounting surface needs to support the charger and its cable without wobbling or pulling on the connections. If the wall is uneven, fragile, or externally clad, the installation method may need extra care. A solid start makes the later configuration much less frustrating.
Running conduit and connecting the wiring
Conduit protects and organises the cable where it is exposed, while the route itself should be secure, tidy, and appropriate for the property. The electrician connects the wiring according to the equipment instructions and the approved circuit design. I resist the urge to judge the work by neatness alone; the concealed details matter too.
Before anything is energised, the installer should check connections and protective devices. A clean conduit run is pleasing, but it is only one part of a sound installation. The finished system must also be accessible for future inspection or repair.
Mounting and configuring the charger
Once the wiring is ready, the charger is fixed in place and configured for the vehicle and installation. This may include setting current limits, connecting an app, joining Wi-Fi, or establishing a charging schedule. I ask the installer to show me the basic controls rather than assume I will decode them later.
I also save the login details and configuration information somewhere sensible. If the charger changes hands with the property, that information should not vanish with an old phone. A few minutes of explanation can spare a surprising amount of button pressing.
Testing voltage, connectivity, and charging performance
Testing should cover the electrical supply, protective operation, charger status, and an actual charging session. I watch for clear indicators, secure connections, and a vehicle that begins charging as expected. If an app is involved, I check the connection while the charger is operating rather than merely admiring a successful pairing screen.
I note any unusual noise, heat, error message, or repeated interruption and report it before the electrician leaves. The first test is the best time to resolve a small issue. I keep the commissioning information with the other documents so I have a useful reference later.
Budget for the full project
The charger itself is only one line in the budget. I allow for electrical labour, cable and conduit, protective equipment, mounting work, permits where applicable, and any changes needed at the switchboard. In Australia, the final price can vary substantially with the property and location, so I prefer a written quote to a neat online estimate.
Typical charger and installation costs
I avoid treating a single published figure as a promise. A short, accessible cable route may be relatively simple, while a detached garage or difficult wall can involve more labour and materials. The equipment price also varies with output, cable design, smart features, weather suitability, and warranty.
I ask for the charger and installation to be itemised. That makes it easier to compare quotes on like-for-like work and see whether testing, commissioning, and paperwork are included. It also reduces the chance of choosing a superficially cheap quote that grows once the job begins.
Factors that increase labor and electrical expenses
Long cable runs, trenching, difficult access, switchboard work, wall repairs, and extra protective equipment can all add complexity. Apartment buildings and shared parking areas may require coordination with owners’ corporations or building managers. A second visit can also cost more if the property is not ready when the electrician arrives.
I try to identify these issues during the site assessment. Clear photos and measurements help, but they do not replace an on-site inspection where the route or supply is uncertain. A realistic allowance is kinder to my budget than optimistic arithmetic.
Rebates, tax credits, and utility incentives
Incentives may be available through a state or territory program, electricity provider, council, or another scheme, but eligibility and timing change. I check the current official conditions before relying on any discount. Some programs may require approved equipment, installers, applications before work starts, or specific property arrangements.
I keep invoices, certificates, and product details in case an application needs them. I also calculate the project without an incentive until approval is clear. That keeps the decision grounded and avoids treating a possible rebate as guaranteed money.
Comparing upfront cost with charging convenience
I compare the installation cost with the time and effort I expect to save by charging at home. Convenience has value, but I still ask whether the proposed setup solves a real routine problem or simply looks impressive in a brochure. My answer depends on driving frequency, parking access, electricity arrangements, and how often public charging would otherwise be needed.
A smaller project can be perfectly sensible when it meets my usual needs. A larger installation may make sense when the home, vehicle, and driving pattern support it. The useful measure is not the biggest specification; it is whether the charger earns its wall space through dependable everyday use.
Maintain your charger for the long haul
Once the charger is installed, maintenance is mostly a matter of noticing small changes early. I include it in the same mental category as checking tyres or replacing a smoke-alarm battery: not thrilling, but worthwhile. A clean record of faults and settings makes any future service call more efficient.
Inspecting cables, plugs, and mounting hardware
I look over the cable, plug, socket, and wall mount for cuts, crushing, looseness, heat damage, or water entry. I also check that the cable hanger and mounting screws remain secure. If something looks different from the day before, I stop treating it as cosmetic until it has been assessed.
I avoid dragging the connector along the ground or leaving the cable where a vehicle can roll over it. Gentle handling costs nothing and protects the parts I rely on every night. Any repeated error or visible damage deserves attention rather than hopeful ignoring.
Keeping outdoor equipment clean and weather-protected
Outdoor chargers collect dust, insects, and the occasional determined bit of garden debris. I keep the housing and connector area clean using the method allowed by the manufacturer, without directing water into openings. I also check that nearby plants, stored items, and sprinklers have not changed the charger’s exposure.
Weather protection is not the same as wrapping the charger in an improvised cover. Ventilation, drainage, and the equipment’s own rating still matter. If the location has become wetter or hotter than expected, I ask for advice before modifying it.
Updating firmware and reviewing charging settings
If the charger uses software, I review available updates and check that schedules, current limits, and vehicle settings still match my routine. A time-of-use plan or a new household appliance can make an old schedule less useful. I change one setting at a time so I can tell what caused a different result.
I also review app access and remove old users where appropriate. That is ordinary digital housekeeping, but it prevents confusion when a phone is replaced or a household arrangement changes. The goal is a charger that behaves predictably, not one that requires weekly supervision.
Knowing when troubleshooting calls for professional help
I call a qualified professional when the charger repeatedly trips the breaker, becomes unusually hot, shows persistent faults, smells burnt, or has damaged cables or connections. I do not open the unit or bypass a protective device to keep charging. A reset may clear a harmless communication glitch, but it should not become a ritual for a recurring electrical problem.
I record the error message, timing, weather conditions, and what the vehicle was doing when the fault appeared. That gives the electrician or manufacturer a clearer starting point. Good home charging should fade into the background; when it starts demanding attention, I treat that as useful information rather than an annoyance.